Sportsmobile, Not Your Standard RV – Part 10

by Dave Boyer

I went over the air conditioner system and covered some issues with AC (alternating current) power in the previous posting (part 9). This section will go into more detail about RV electrical systems and components. From the beginning I want to make note that there are several equipment options available out there other than what SMB offers.

Continue reading “Sportsmobile, Not Your Standard RV – Part 10”

Sportsmobile, Not Your Standard RV – Part 9

By Dave Boyer

Camping 2008 111 I finally put my van to the test and made a trip to the Autoramblings headquarters located in Fort Collins Colorado (that would be Lloyd’s house). This is the longest run I have ever made to date with my 2006 Sportsmobile. The trip was great other than the out of control fuel prices and no off roading. To tell the truth as much as I wanted to hit some dirt, locking up the hubs was not part of the schedule during this excursion. The journey was a little hectic but at least I found out how many miles I could cover in a limited time frame. Because I wanted to have a few camp fires along the way I brought my SMB Rock Crawler trailer along loaded with wood. At any rate I wouldn’t have to go looking for wood and the fires along with a few brews became a nice way to end the day. The two week tour from central California started with the first night on Sonora pass boon docked on Eagle Meadows road with some friends. Great Basin National Park in Nevada was on the next day’s agenda. After Nevada I was off to Utah looking for a spot to camp along the Colorado River near Moab. Arches and Canyonland National parks were near by but the hot weather was catching up with me. Because I am planning a trip next year while it’s a bit cooler I decided to spend the night along the river and leave early the next morning. From there I drove to Colorado and stayed several days on the Poudre River near Fort Collins. With temperatures around 90 degrees at 8:00 AM the day I left Utah, it was a welcome site waking up to find snow falling at my camp site along the Poudre river. Eventually I met up with Lloyd and we spent several days exploring Rocky Mountain National Park. According to Lloyd we took the van over the highest thoroughfare in the lower US at 12,200 feet and although the pass was packed with vehicles it ended up being an extremely gratifying run. After returning Lloyd to his wife I had some extra time before returning to California so a trip through Wyoming seemed fit. One picturesque pass is highway 130 above the town of Centennial where I spent one night in a great little campground up the road a ways. The next day while trekking towards Yellowstone I drove over the upper portion of the pass frequently called “Snowy Mountain???. It was breathtaking at this time of year with a large amount of snow, plus the pass had a lake that was frozen over which was a bit of a surprise coming from California. From where I camped along highway 130, Grand Teton National Park and neighboring Yellowstone was about eight hours away. After finding a nice campground in Teton national park, I spent just enough time to realize that both of these parks deserve more time to explore than the time I had allotted. As a rule I’m not in to the tourist traps, but Yellowstone in general is something to see. The Grand Teton range on the other hand offers a little more privacy and a few dirt roads to check out. Both parks are well worth taking the time to visit. But this was a road trip and after a couple of hectic days, I was off to re-visit Great Basin National Park. This park offers a chance to beat the heat compared to the surrounding area especially if you take the cave tour which is what it’s famous for. From here it’s only about 10 hours to upper Yosemite or Sonora pass. Unfortunately I decided on Yosemite and found everything closed in the upper section forcing me to head towards home. I now know I can drive from the Nevada/Utah border to Central California in 12 hours. Being able to set up and tear down quickly, coupled with reasonable fuel mileage and off road capabilities makes my Sportsmobile a great choice over a standard large RV.

The air conditioning unit

Since the writing of this portion, SMB now offers a different air conditioner system made by Danhard. Changes and upgrades are common with modifications in the industry. I may discuss the newer options introduced by SMB from time to time, but please understand that I will not be able to comment how well any new devices or systems operate from a first hand basis. I plan to add a page of upgrades at the end of this article. If someone points out any pros or cons I will gladly post what I’ve been told. BTW Danhard did manufacture the Starcool system which is no longer available.

A few new owners have mentioned that the Danhard air conditioners are an improvement over the Starcool system that came with my vehicle.

http://www.danhard.com/

There is also some good information in this PDF file from Dometic.

http://www.dometictruck.com/pdf/L-2523.pdf

Starcool operation

Another big and expensive option is an additional add-on air conditioner system. The Starcool air conditioner system is the unit that was installed during my vehicle’s construction. It’s a supplemental air conditioner, not the factory Ford A/C that comes with the vehicle. I have been told that there are a couple different versions but I will be keying on my unit which is classified as the Starcool III. Living in a hot climate during one third of the year was a sure sign that the Starcool option was going to be a definite addition to my vehicle. It works very well at cooling down the vans interior quickly, and according to SMB it takes some load off the stock A/C system. The Starcool III (which I will abbreviate as SC) has the ability to operate while driving or while plugged into shore power. On the road the two systems, both the factory and SC should be operated together. I have been told that the stock Ford system and the SC are tied together and use the same coolant system. It is up to you how to set the rear SC fan speed to the level needed. On my vehicle, the Starcool’s primary activation switch is located on the wall behind the driver’s seat, so you can turn the system on when you start the engine and need cool air. The fan control switch is located in the mid section close to the sink. It has 4 settings for air flow (off, 1, 2, and 3, the maximum fan speed). The rear fan control should be switched to one of the 3 fan settings other than off. The primary switch is used to turn the system on and off. This might be kind of an inconvenience having to reach over your shoulder to activate the system but it works fine for me. When the weather is real hot I set the SC fan to the highest setting and adjust the stock front A/C for the desired comfort level. When the weather starts to cool off a bit I might lower the SC fan to keep the cold air from blowing down my neck while driving.

Shore power and alternating current

I have been told you can order a Starcool system that runs only off 110V AC shore power. From what I gather it is a standalone unit that does not use DC voltages. You will have to check with SMB if they (still) offer this. With my unit I can do both, that is, run it off the vehicles 12 VDC system while driving, or park where 110 VAC available. In the AC mode it acts just like an air conditioner in your home. Just remember that you will need at least a 30 amp power plug, extension cord and service box to connect to the van. A small typical house plug will normally not be rated high enough for this amperage and may cause damage to the Starcool. On top of that AC is polarized. In other words there is a hot and neutral side to a typical plug. Verification of this is important before you “plug in???. Never use the wrong pig tail to connect to shore power. A pig tail or extension cord must have the correctly rated plugs and wire which can handle the necessary loads that the SC pulls. Cutting off the ground lug can cause all kinds of trouble for you, one being reverse polarity. It’s possible to energize the van and be shocked by making the latter mistake. The box you plug into can also have a polarity problem. Polarity can be checked with a cheap tester that I will discuss below. Another issue is an extension cord that is too long or coiled up. The main problem with this is low voltage. It’s important to use the right cord, the best being one that is as short as possible, the correct gauge, and never use it if it’s coiled up. While it is OK to charge batteries, run lights, or fans via a standard household plug, the Starcool must not be operated with this type of connection. Operating larger portable electric heaters, the microwave (for long periods of time) and especially the Starcool is not advised using less than a 30 amp service. Even worse disregarding this might start a fire due to overload. Most RV parks offer 30 to 50 amp plug in stations at minimum, but you will need to verify this. Don’t attempt to run the air conditioner off a 20 amp circuit. 110VAC is a misconception. True AC voltage is between 115 and 127. Dropping below 115 is not recommended. Because there is no such thing as guaranteed clean voltage, it is important to test and monitor shore power. There are several devices to check this and in fact most high end inverters will warn you of “dirty??? power. But systems such as the Starcool which run off the shore power directly (not through the inverter) can be damaged if the voltage is not up to correct specifications. Therefore it is advisable to have some sort of protection that will automatically disconnect you from the grid power if something goes wrong. As far as polarity testers, cheap ones are OK for testing it but usually do not protect your investment from low/high voltages or if a failure occurs while connected to shore power. Just because a shore power pedestal looks correct doesn’t mean it has service wire that’s adequate to keep the voltage up, so it’s important to test the voltage under load. While it’s not possible to sit there and look at the voltage gauge while asleep, chances are if you check it under maximum load you should be good to go. I might be over reacting here a little, but it’s better to spend a dime to save a dollar. I’m an electrical trouble shooter for a power company and that’s what I do for a living. Many times I have responded to trailer parks (or other electrical customers) where the owner has lost several high dollar items do to poor power. Trailer parks are notorious for having poor electrical systems that fail on a regular basis. Shore power at a resort is no different. Test it, monitor it, and supply your own protection! This link is good to read.

http://www.zapfreerv.com/

A friend who is a qualified A/C mechanic told me that most air conditioners are designed to work on voltages of +/- 5% of 120 volts. Although many things are designed to work on sub-standard power, it puts unnecessary stress on some items. Shoot for voltages between 115 and 125, preferably 120 volts which is a good voltage that most electrical devices like. Below are some links to protection devices. Just remember that most surge protectors deal with high voltage only and long run times at low voltage can be just as bad. The reason high voltage is a big issue with surge protectors is it destroys electronics where as low voltages don’t pose much of a problem.

Larger RV’s that are left unoccupied usually need something that doesn’t permanently trip off line until reset. Returning home to warm food in the refrigerator is not a plus. The problem is that some of these devices will only cutoff or “clamp??? voltages when they are too low or too high for compressors. The Starcool shouldn’t be subjected to these voltages. A monitor which has an alarm that can be preset to notify you when the voltage meets the preset parameters would be an additional benefit. Unfortunately these monitors seem harder to find as compared to their DC counterparts. Do a search for the right item that suits your needs. Here are a few typical RV surge protectors design to help your RV, just don’t think they are a guaranteed solution.

http://www.campingworld.com/shopping/item/rv-surge-protector-circuit-analyzer/35145

http://www.campingworld.com/shopping/item/digital-line-monitor/24900

http://www.pplmotorhomes.com/parts/rv-power-cords/rv-surge-protector.htm

Now in reality a Sportsmobile isn’t like a diesel pusher and I would be perfectly content with a good voltage monitor and surge protector. Most owners operate off DC and don’t usually hook up to shore power unless they are at home charging or need the air conditioner because it’s hot. I wouldn’t worry about all the high dollar protection devices because most of the time you will catch the problem before it causes major damage provided you do some testing before and after you hook up. If you’re a full timer and move from spot to spot it might be more of a concern. But look at the odds. How often have you had a bad experience with your electrical panel at home? I would venture to say most have not, and even if you did how many times? It’s very rare when I have to return to the same residence to trouble shoot a problem. So don’t worry, just test it, monitor it, and supply your own protection!

I haven’t had too many problems with the Starcool system but have yet used it when plugged into shore power. I have been told that it cools relevant to the outside air temperature. This is better than nothing, but in hot weather it might not be up to par for those looking for a 65 degree environment while it’s 105 outside. But remember I haven’t tried it yet. One Forum member claims he can get his van down to the lower 70’s with outside temps hovering around the upper 90’s using the Starcool A/C on shore power. Another owner claims that their new Danhard unit is more efficient and will bring the inside temperature down to 70 degrees in 100+ weather. Hmm…maybe a change for me in the future. I’m sure how the van is insulated makes a big difference and more people are requesting better insulation these days. My plan from day one was to install a 50 amp service close to where I park to serve as a home shore power port. With that I can run the SC during the day before leaving on a trip keeping the van at a reasonable temperature.

As for the Starcool III, as a vehicle air conditioner, it has its share of hours put on it in my rig. The SC combined with the stock A/C works quite well. My biggest gripe is where they mounted the primary system switch. Like I said, I don’t have a problem reaching over my shoulder to turn it on and off, but if I were to order a new van I would insist that an indicator light be put on the dash that shows the system is running. Because the primary switch must be turned on even when you’re plugged into AC power, it’s mounted for access from the mid section of the van as well as the driver’s seat. Activating this switch will keep the fan running even if the ignition is off. If you forget to turn off the primary and fail to hear the fan running after exiting the van, you will end up with a dead house battery within a few hours. This generally happens to me when I get out of the van while the stereo is cranked up loud. Although I haven’t killed my house battery yet an indication light on the dash would be nice. The SC does pull a fair amount of DC amperage off the vehicle’s charging system also. I upgraded my alternator to a 200 amp version in part because of this, but it’s not required. The larger alternator gives the ability to run the SC along with other systems the van needs while still providing a good charge current to the house battery.

There is no way I would be without the Starcool or some other type system, but I like to avoid heat at any cost and boy does this setup cost. I don’t know how prices stack up between Danhard’s new unit and SC, but Danhard has been making climate control systems for truck drivers and ambulance companies which I would think is a plus as far as reliability. Talk is that that the new Danhard air conditioner that SMB is using has a lower DC draw and can run off a 2000 watt generator where the SC needs about 3kW. More and more people are verifying this but I still don’t have any information on battery operation. My thought is it still would require a very large bank of batteries to operate for any extended length of time.

The Starcool III is a complicated system with stuff running all over the place. It could give Ford a reason to complain about working on your stock air and not honor your warranty. And because this add on equipment is tied to the stock OEM system, it might make normal maintenance more difficult for mechanics. I could see this becoming a reason to charge more for repairs to the stock system when it might not have anything to do with the Starcool A/C at all. They might even refuse to work on your vehicles A/C altogether. So far I haven’t had Ford hassle me about it. Only time will tell how it holds up and whether it causes other problems with the stock van system. I lost the coolant in mine and had to take it back to SMB. If Ford would have even considered working on it, I wouldn’t have wanted to see the bill. Personally, I’d prefer to have a standalone system that has nothing to do with the stock air conditioner. I’ve been told the Danhard is an individual system and would think it would be a good choice being it’s fairly small. Unfortunately size matters and most other individual air conditioners are big bulky units that sit on top of the vehicle and need shore power. California has passed a clean air law about how long a diesel can idle. It stabs at truck drivers who pull over to sleep while on the road. This law will probably promote advancements in climate control systems that require less power and/or smaller sized units to be made available in the near future. As I said earlier, most Sportsmobile’s don’t have the room for a large enough battery bank to power an air conditioning system overnight. Hopefully improvements in battery technology will move forward in the upcoming years with companies developing smaller batteries that deliver more power. The new Danhard system looks like it’s designed to address load problems, but again I haven’t researched it much. More than likely you’ll still require a generator or shore power to run it all night.

Other less expensive options are out there such as swamp coolers and ice chest type coolers. Maybe you’re the type of person who isn’t affected by heat like I am. Portable 12 volt DC fans can help and pull about 3 amps. Some of these might be an option.

http://www.swampy.net/

http://www.campingworld.com/shopping/item/fan-tastic-endless-breeze-12v-fan/38132

The sink and counter tops

clip_image002

The model usually designates how the sink area is set up but it can also be custom made to fit. Some kitchen areas utilize standard counter tops but many incorporate Corian. Sinks can be ordered in stainless steel if it’s preferred.

clip_image004

In my EB-50 plan, the sink and counter tops are both made of Corian.

EB-50

Corian does make for a rather nice upgrade but beware that it can be scratched. A little wax will touch it up. Some owners opt for a small pedestal type sink area. This is your choice when placing an order. A pedestal sink is often preferred by those who are setting up their van for transportation needs and need maximum space savings. A sink is usually accompanied by a gray water tank. Some exclude this tank from their design plan for a variety of reasons but it’s usually to gain space, save weight or reduce the overall cost. As I have already said, the sink is a plus to have for many reasons.

Normally the standard propane stove is installed in the counter top next to the sink and SMB now offers a flush mount stove that looks great, but if you have followed this article you know I opted out of the propane system. To have hot water you must have one of the options to heat the water that has already been discussed. Again to qualify a van conversion as an RV, running water, a sink, and a holding tank helps make the requirement.

The Bath

SMB offers a variety of ways to set up a bath area inside the van. This was probably the least important option for me. Being the kitchen sink is a standard item, I have an area to wash up, brush teeth as well as wash dishes. I have no use for an inside shower because of the room they take up. And because of the room I take up, they probably don’t make one big enough for me anyway. Submarine showers are fine but I’m sure the ladies will not agree on this. The outdoor shower wand was a good choice. Called the exterior shower, this shower wand can be installed in a variety of locations. I opted for the standard location at the right rear side of the van. Open the back doors, pull out the shower wand, turn on the hot and cold water knobs on and burn your head off. The first time I used it I let out a blood curdling scream. Yes the hot and cold controls are a bit difficult to set, but you soon learn how to use them without hurting yourself. If the insects are not thick, I set up a shower curtain to keep water from splashing all over the doors and inside the van by using aluminum tent poles and cheap curtains from Wal-Mart. Some people use a sun shower and just fill it up with warm water from the sink, but the wand is handy. SMB now offers a better shower wand now and I am looking at a temperature control valve as well as an outside hookup. Being able to shower without the doors being open has some huge advantages if insects are buzzing around.

The Head

PORTA POTTI VS MARINE TOILET:

clip_image006

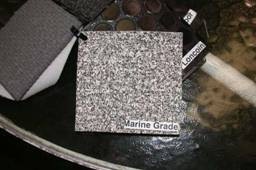
I purchased the porta potti, a device that I have yet to use. I guess I’m just scared of the thing but it is nice to have a backup in an emergency. I carry a privy tent that also doubles as a shower that I set up behind the van to shower in when I need a little privacy. At this time I use bio-bags rather than the porta potti in the privy. I might re-evaluate hauling the porta potti in the future especially during long trips when I’m on the road by myself but the cabinet it’s stored in is a very valuable space. So for now I leave it at home and use the cabinet area to store a variety of items. A marine head can’t be removed like a porta potti. Here again is another insurance snafu. Back to the gray area of what constitutes an RV. I don’t think that a porta potti qualifies as a RV toilet but I could be wrong. This is something to take up with your insurer but even they can be misled by the fine print as I have pointed out in an earlier post. Insurance companies claim that too many people are saying that their standard vans are RV’s so they can get cheaper insurance. It would be bad news to total out your vehicle and find that you’re not covered though. The standard marine head that SMB offers requires a black water tank and this too takes up valuable space under the vehicle. A dedicated bathroom inside the van takes up a lot of room, so it was not suited for me but I’m sure others disagree.

The Interior

XL STORAGE:

The most important item in this section is the XL storage area. This is one of the most useful items I had installed. It is a large area located at the rear of the vehicle where the spare tire is normally stored. SMB moves the tire outside and installs a larger water proof box that can be used as storage or even an ice chest. The bottom has a plugged drain hole to let the water out, but I use it for tools and equipment storage. It requires you to install a bracket to hold the spare tire on the rear of the vehicle. The only gripe I have heard is water getting into the storage area from outside the cab. It has never happened to me and I’ve been in some very wet conditions as well as a few streams.

THE SAFETY MIRROR:

The rear view mirror can be changed out to one similar to what comes standard in most high end vehicles. It has a compass, thermometer, and adjusts to bright car lights sneaking up on you at night. With tinted windows it doesn’t really do much for dimming bright lights but the compass and temperature read out is a nice option to have. At over 300 bucks though, you can probably find a cheaper solution. It would be great to have a clock in it. I don’t really know if I would order it again.

LUMBAR SUPPORT:

Another item I wasn’t sure I needed was the lumbar support for the front seat that I already discussed. I am glad I requested this to be installed. This makes a big difference on long trips. Basically you just turn a knob which inflates a bladder type bag. Simple yet effective.

THE PORTABLE STOVE:

This was already discussed in detail. All I can say is it works OK and can be used on the counter top without heat damage to the top.

Thanks for reading Autoramblings and I hope these articles will be helpful. The next posting will go over some of the electrical systems.

Sportsmobile, Not Your Standard RV – Part 8

By Dave Boyer

In case you are new to the special vehicle section, this article deals with a four wheel drive van I ordered in 2005 made by Sportsmobile. In the last post I went over a few interior items and will continue down the list of options provided to me in 2005. This post will discuss my choices concerning the water, refrigeration, heating and cooling systems. Again, these are my views only and other owners may disagree. Please see the previous posts.

The water tank.

Fresh water was a big concern for me when designing my van. Many people bring along bottled water for drinking and cooking. Maybe their water at home tastes bad, but my home town water is great so an onboard tank would suit my needs for potable water. I just have a problem with water that sits in a RV water tank for months at a time. In the 50 model, the standard location for the tank is under the sofa. The main problem is you can’t drain all the water out of the tank, much less wipe it down from time to time, so I use bottled water to drink as well, something I had planned to avoid.

Check out this site: http://www.aquasaverbypjbcompany.com/

It would be nice to add this porthole to the tank but I would want to see whether it would fit, how easy it would be to use, and most important, verify it won’t leak. I’ve also heard of the water tank freezing, but this has yet to happen to me. There are tank heaters available to prevent this if you are exposed to such harsh weather. Of course I wanted all the water I could get, so I ordered the biggest tank. I paid extra for the largest tank that would fit which I’m told actually holds about 18 gallons. My main reason for the larger tank was due to the shower that I will discuss in detail later. Several owners had opinions on how they would clean out their tanks which can be found in the Sportsmobile owners group archives section and many claim that drinking from their tanks have produced no ill effects. I would like to install a small tank to hold drinking water that can be removed, inspected, and cleaned more easily, I just am hurting for space. For now 2 gallons of water will last me a week for use in cooking and drinking.

The refrigerator.

The refrigerator is an item that takes some consideration. At the time of my purchase there were few models and a couple of sizes to pick from. I ordered the larger size (4 cubic feet shown here) and it’s amazing how much you can pack in this unit.


clip_image002


The larger (4CF) size will take up valuable cabinet space though, and there might be issues where it is installed. The smaller unit shown here might be enough for many.


clip_image004


Check out the cabinet on top of the refrigerator. Notice how much extra storage there is. Although the size of the top cabinet can be designed to any size, this seems to be popular. I just didn’t like how the window is blocked making it difficult to raise and lower the window shade but the extra space is very nice to have. It might seem silly to have a window that is blocked, but air flow can help keep the refrigerator from cycling on too often during cooler weather.

With my layout, the large refrigerator is one way to step up to the penthouse bed, but using it as a step “up??? depends on which direction you want to sleep on top. Personally my feet end up toward the front of the van and the bed is pushed all the way back towards the rear. So the refrigerator is the best way up. Depending on the size of the refrigerator and how the cabinets are arranged, placement can dictate on how you climb up to sleep. SMB will tell you the best route up to the PH bed (for instance it might be the bench seat), but it’s important to actually try this out before making the order especially if you make a change from a standard model. Here is another reason for a factory visit to Sportsmobile. The larger unit is a bit too tall so I carry a small folding step or an ice chest as the 1st step up. I didn’t intend on having to use a step.

The 4 cf unit has a reasonably sized freezer but I have found that if you turn up the thermostat high enough to truly freeze foods hard, the rest of the refrigerator gets a little too cold. It also cycles on more often which pulls down the house battery faster. At least that’s the way mine works, so no ice cream for Dave. With some basic improvements such as insulation who knows. The freezer does help keep things like meat and chicken semi frozen giving them extended time before going bad. I also use it to keep vegetables frozen in boil bags. In fact any previous cooked foods vacuumed in food saver bags works great.


clip_image006


I wouldn’t be without the freezer even though ice cubes are usually out of the question. It keeps most foods cold enough to keep from spoiling, and heating by boiling in these bags qualifies as an easy clean up meal. Several other companies other than Norcold make units that might qualify as the perfect refrigerator. Here again is an item to research. Is a better unit worth the extra cost? Very possible. With the advent of the Sprinter Van, a larger refrigerator might be available. Some people have even had more than one unit installed and use the second unit to store items when not in use.

My (2-way) refrigerator runs on AC and DC only, but SMB did offer a unit that runs on propane and electricity called a 3-way. As far as a propane powered refrigerator is concerned, my past experiences dealing with gas operated units led me to stray away from them. Concerning propane, it was just one more thing I would have to run around and fill up. I also remember how there was some maintenance issues with my Dad’s gas refrigerator in his trailer. Maybe these problems are a thing of the past, but if I didn’t need it, why have it. Some states have laws about entering a tunnel while carrying propane. Don’t get me wrong, there are many folks out there that wouldn’t do without propane and will swear by it. I will discuss my views on propane in more detail later. My major goal was to keep the van fully stocked and ready to go with the least hassle, so electric seemed to be the logical choice. I didn’t need the extra annoyance of a multi powered unit. If you don’t have solar, a propane/electric unit might be of interest.

The biggest gripe from customers is the vibration noise from the refrigerator. This type of noise never bothers me but many folks say it keeps them from sleeping. This is a major issue that seems to come up continuously on the forums. It seems that some refrigerators are louder than others and I have noticed that how the vehicle is parked (such as off camber) can make a difference on the noise. There are ways to deal with this, insulation being one. Research it.

Stoves, heaters, and propane.

What about a stove? Here is another item that requires some thought. All the trailers and campers in my past had propane stoves. As a kid I always thought it was really cool to cook inside. Of course I never cooked inside a tent because of the obvious reasons. I wasn’t too elated about cooking bacon or fish inside the van either. Hum….SMB vs. bear, not to mention the lingering smells.

So here are my views:

>I didn’t want to mess with filling a large propane tank in the van or looking for places to fill up. Also the tank would have taken up space that I needed for some other equipment so it got knocked off the list early on. I must confess that I do carry a couple of 1 pound bottles, one in my trailer and one in my rear storage box. Being portable they work well in the outdoor kitchen. I can take any vehicle down and fill the small tanks at any time. These one gallon tanks will last for well over a week powering Coleman stuff like lanterns, an outside stove and a barbeque.

>How often do I really cook inside? I use a barbeque most of the time and I can’t have that inside. I also cook on the fire a lot. Trying to cook a meal both outside and inside at the same time seems impractical. Hey what happened to my steak? Oh, a critter took it when I was in steaming vegetables in the van….nice. OK, there will be times when it will be necessary to cook inside. High winds, rain, snow, that kind of stuff. Now I must admit it is real nice to kick back inside a nice comfortable warm van with a hot cup of coffee or tea. There are a few ways around this. Some people don’t want a stove just because of the space it takes from the counter top, but if that doesn’t bother you, one idea did hit home with me. It’s possible to plum in a propane line to a cook top. Of course safety factors would have to be considered. You can have it set up to put a small bottle under the sink or have a spot outside the van to hook a larger external tank to a propane port. I might do this in the future, but for now I just bought the little butane stove that SMB sells.


clip_image008


There are all kinds of stoves available from other sources. A few companies such as Iwatani and Wedgewood offer higher end products. Others like Stansport, Sterno and Wonderworld are more common plus you can’t leave out Coleman. Backpacking stoves such as Jet Boil, Pocket Rocket, and MSR styles can be used but stability while cooking with a large pot and the amount of heat put on the counter top must be taken into consideration. White gas stoves such as my old Svea 123 are the best stoves to operate in high altitude and sub-0 temps but I would never use a gasoline stove inside a vehicle.

I added Velcro to the case of my butane stove case to keep it in place on the counter top while on the road. It has never moved or fallen off the counter on any rough road or off road trail. If you do this make sure to add felt to the bottom of the case or it will scratch the counter top. Although I must carry butane fuel, this has worked well for me. It also is great to set up outside when my large Coleman stove is at home in my SMB trailer.

One thing to mention that was touched on in previous posts is your vehicle qualifying as a true RV (see the insurance portion.) If you don’t have a dedicated built in stove, your insurance company might have qualms about coverage if you’re in an auto accident. I was told an installed microwave counts as a stove but it must have the ability to run off an inverter, be built in, and not just sitting on a countertop. This is something to take up with your insurer. It’s been a very gray area for me. If SMB ever offers a diesel stove top, I’m there.

>Did I mention that there is a rebate to delete the propane system? I have no idea if SMB is still doing this, check with them. I saved close to 1000 dollars.

>The propane tank takes up space under the vehicle and depending how you set it up, you might have to go with a smaller tank or delete an item you want. This depends on several factors, just be aware of this.

Now to the main reason most people get the propane. The heaters. The furnace and hot water heaters are important to many folks. Being I wasn’t going to get talked into the propane world, I spent the extra few thousand bucks for the Espar Airtronic cab heater and Hydronic water heater. For people on a budget this is an expensive upgrade and just not worth it compared to the propane counterparts. But it was a high tech item I had to have. The only problem was I ended up as some sort of a beta tester. Unfortunately SMB had only installed a few units prior to my order. I had problems which I will get into later. My plan was an all electric, self sufficient diesel rig that wouldn’t require propane, so the diesel heating components were right up my alley. I also liked the idea of a block heater that pre-warms the engine.


clip_image010


The timers have LCD screens that show information such as how much time is left during a run cycle.

The Hydronic has a timer, so I can set it to come on prior to driving. This can really help with the longevity of a diesel engine, plus you can set it to cycle on during early hours when stuff freezes. As with all water systems, you need to be wary of extreme cold weather. If the van sits in storage or is unoccupied for any length of time, problems with the potable water system can occur in temperatures around or below 32 degrees. You are instructed to drain the water to keep from doing damage to water system. Even while driving, water lines can freeze, primarily because a large section of lines are routed outside the cab under the vehicle. The coldest I have been in is 8 degrees and no problems surfaced, but that was before they did the upgrade to the flat plate. I have yet to test it in harsh conditions. The flat plate is a device similar to a heater core that takes hot water from the motor to heat a separate line of fresh water. The Hydronic uses a small diesel heater to heat the engines anti-freeze in one side of the flat plate which in turn conducts heats to the opposite side of the plate where the fresh water flows past and becomes very hot. It also keeps warm water flowing around the vehicles engine block. That’s how it warms up a cold motor. If the engine is hot from the motor running, you do not need to fire up the Hydronic to get fresh hot water. Some people opt for the flat plate without the Hydronic and just run their motor to get hot water. It’s a much cheaper install. But diesels are cold blooded and this takes time if you want potable hot water in a hurry, especially after the rig has set all night in freezing temps. The Hydronic will supply hot water in a few minutes. The Espar Hydronic unit did give me some problems. The first thing I noticed was how loud it was. You could hear it along way from camp. If I were in a developed campground I never ran it. Then I had flame outs all the time. At first SMB thought I wasn’t using the altitude switch. The early units would flame out at high altitudes and SMB installed an altitude switch to adjust for thin air. But I was using it correctly and they were stumped. I started to think I had made a mistake buying this high dollar option. Practically all my excursions were to areas above 8000 feet. Finally they made a call to the manufacture and found they had installed the exhaust incorrectly. SMB said the Espar company failed to give them the correct instructions on how to install the unit. No problem, it got done but cost me a few days of my vacation and fuel. Like I said in my previous post, “it will get done, it’s just gonna take some time and fuel.”  While I was there another guy with a similar problem heard me complain about the noise. He said he went on line and noticed they made a muffler for the exhaust. Surprise! I told SMB I wanted that installed. What a difference and it took a customer to tell me about it. The next problem came through the SMB owners group. Someone got anti-freeze into the drinking water. This went round and round until finally SMB found that they had been shipped the wrong flat plates. It was kind of scary to think about. SMB was fast to jump on it, but it still required another trip to Fresno. This was another case were it was the fault of the manufacture as I noted in the previous posting. I don’t blame SMB for the most part although I would like to see a more proactive movement toward designing a van that can handle a cold environment. The next problem I encountered was a variety of code failures. The control panel will show codes that help diagnose the reason it shuts down. I got several new codes and was unable to run the unit more than 15 minutes. The word from Espar is it was plugged with dust. I’m not thrilled with this at all being it’s installed behind the front tire of a four wheel drive vehicle. I am going to come up with a solution on isolating from the dust or learn how to maintain this thing myself. New equipment has flaws and someone has to deal with it, and it’s usually the customer. Most everybody I know who owns an RV has problems with some part of their investment. This is why I deal locally when buying anything complex. Espar is well known to truck drivers and are used heavily in big rigs. I hope to find a dealer locally who can work on these things. I’m not sure if I would order the Hydronic again due to the problems I have had and only time will tell. Maybe it’s a fluke. According to SMB, my Hydronic seems to be a lemon. I will have to see what Espar charges for the repair and discuss moving the unit out of a line of dust with SMB. I live in an area that seldom gets colder than the upper 20’s so the cold is not an issue for the most part. If you live where the van sits in very cold weather for any length of time you might have problems if you don’t drain the system. This is where I would seek out owners who endure these kinds of conditions and ask their advice. One advantage to propane is the system is very reliable and has been around for a long time. I have no idea what cold temps do to propane. Ask.

OK now to the cab heater. The Espar Airtronic is a great unit. I really haven’t had any problems to date and it has been one of the best options I decided on. The unit itself sits toward the back under the closet on the driver side in my EB/50 which is an inside storage area. Care needs to taken to ensure that the air intake isn’t blocked. The heater’s exhaust port is just below the foot of the sofa/bed under the pantry. This varies from model to model and may be located in different areas. The Airtronic kicks out enough heat to keep me warm with the top up in 8 degree weather while sleeping in the penthouse. I usually sleep up top in a cheapo 40 degree sleeping bag and have never had the thermostat above three quarters. All the newer versions have digital readouts and timers similar to the Hydronic controller. This timer helps to keep things from freezing in cold climates if set to come on. As noted earlier, I have heard of the fresh water tank and water lines freezing inside the van. If you’re away from the van you can set the timer to keep the inside warm. I am not fond of the way it adjusts. Too bad it can’t be set to a specific degree. More than once I have had to get up in the middle of the night sweating when it’s 30 degrees outside, only to turn down the thermostat and awake somewhat cold later. I have learned to deal with it and I prefer it on the cooler side anyway. Having the heater run more often pulls down the house battery and causes the refrigerator to cycle on often which leads to more DC drain. Another problem that can occur is the heater shutting down because the vehicles fuel tank being low. Because both the Airtronic and Hydronic run directly off the vehicles diesel tank, a safety has been installed to shut them down before the fuel tank runs too low. It makes sense to have this for a couple of reasons, one being, who wants to be stranded in the back county out of fuel. The second reason is that running the motor out of fuel is not very therapeutic for a diesel engine. Although the 6.0 PSD has built in safety factors for this, it’s not advisable. It’s difficult to find this shutdown point partially because I actually don’t know when I have only a 1/4 tank left. This has to do with the aftermarket tank that I will discuss later. Safe to say, I keep my fuel gauge over one quarter and have not had to wake up frozen to my bed yet.

The next portion will start with the air conditioner. Thanks for following Autoramblings.com

Sportsmobile, not your standard RV – Part 7

By Dave Boyer

Thank you for joining this ongoing article.

In the past postings (parts 1-6), I have gone over the purchase of a recreational vehicle I acquired a few years back called a Sportsmobile. The last post dealt with models and designs. I’m sticking to SMB 2005 brochure and the following article will cover some of the basic inside options such as the floorboard, window options, seat coverings and colors.

Please remember these are my choices and my opinions. I have no affiliations with the Sportsmobile Corporation other than being an owner of a Sportsmobile vehicle. Also be aware that the brochure has been upgraded since 2005 and many of the options have changed.

Flooring selections.

The inside floor board comes in a few styles. I asked for the marine grade vinyl because it looked like it could take abuse over the standard vinyl floor. After seeing how it’s applied, I now think they will all wear to some extent and it would be difficult for me to say which is more durable.


clip_image002


SMB now offers some flooring that I would prefer over my choice in late 05. As I said, I really can’t comment how any of these choices will hold up to traffic, but the diamond plate floor feels very heavy duty and I like the looks.


clip_image004


The Loncoin seen here in the picture below seems to be very popular with many new buyers.


clip_image006


Some people use the vinyl floors as the only surface to walk on and colors can be matched to compliment the inside of the van. But I had plans to put in the pre-cut carpet option which would keep the wear spots to a minimum, add cushion and help in controlling the floor temperature. At around $220.00 dollars, the pre-cut carpet overlay for the EB-50 fits well, is easily removable, and allows you to shake off all the debris you track in. The Marine Grade vinyl is rough and looks like it would keep the carpet from sliding around, but I’m not sure how the other floors will react to the carpet overlay.


clip_image008


Later I found a cheaper rug to throw over the SMB carpet. This might be overkill but if it gets stained, all I have to do is run down and buy a new one. Some of the newer floors definitely look like they would be easier to clean than the Marine grade vinyl. The Carpet Overlay was expensive but if you’re handy, a cheap throw rug from Wal-Mart fits pretty well in the EB-50. One thing I highly recommend is to ask SMB to add as much insulation under the floor board as possible. My extra rug helps a bit, but additional insulation below the floor board would keep the inside of the van cooler in summer. Insulation is an important issue that I will go over in more detail later. SMB has taken a more pro-active approach toward the issue of extreme temperatures which was mostly due to customer input. I was surprised how warm the floorboard got after a long drive. It only took a few trips before I realized what others were talking about and decided to add another layer of carpet. More carpet also helped while kneeling inside the vehicle with the top down, something unavoidable for me. Make sure the lower cabinets will still open if you add an extra carpet. The cheap carpet has saved me from the crews tracking in grease, silicone, and other junk that will stain the carpet overlay. I’ve already tossed one cheap carpet.

Windows and window accessories.

Window shades keep prying eyes out, but the Day/Nite shades do not completely block the entire window.


clip_image010


These “accordion style??? pull down type shades travel on vertical strings and have two different modes; a blocking mode as shown in the above image and a sheen mode seen below.


clip_image012


Too bad they can’t cover the sides of the windows. I don’t care because I usually put in some reflecting material cut to the window size anyway.


clip_image014


This helps keep out heat and cold, plus if cut correctly it will completely cover the windows. The window shades (fabric curtain types) look to old fashion for my tastes. I passed by on this option even though I believe these were a standard no cost item. It is important that the inside stays hidden when the rig sits. Most people have no idea what is in the van, and that’s a good thing when it comes to theft. I would rather have the windows covered and a sticker that indicates there is an alarm on board over an uncovered window that shows an alarm light. On the other hand, the sight of an active alarm plus a “Club??? device on the steering wheel might deflect would-be thieves. A broken window might be more costly than stuff like clothing, utensils, and the typical junk that might be stolen from an un-loaded van. The day portion of these shades will let in light, which allows you to look out, while making it very difficult to see in as shown in the image below.


clip_image016


These work quite well and help to maintain daytime privacy while allowing you to see what’s going on outside. They’re great at the beach. You can gawk all day.

One problem the Day/Nite shades can have is with the strings breaking. Vibration can wear on the string but so far I have had no problems to date. My conversion also came with a cloth privacy curtain that snaps to the windshield but I rarely use it.

I keep Reflectix in the windows religiously while the van is not in use, and keep the Day/Nite shades up to help keep their shape. The reflectix protects them from sunlight. Too bad I had to give up the idea of buying a home with a 4 car garage and RV section, but then I wouldn’t be able to afford the Sportsmobile. PRIORITIES!

There are options for different styles of windows, tints, and placement. Just beware that a few people have had problems by asking to have a window installed a unique spot. Once the hole is cut, that’s it. The window in the next image offers some added ventilation but this particular style doesn’t completely seal out all insects when open. Actually most of the windows do more than adequate toward stopping most flying pests but the dreaded “No See-Um’s??? can get through screens, especially the penthouse screens. I hope I never have to deal with these tiny bugs.


clip_image018


This image shows the tint that SMB recommended and although difficult to see, the picture below shows the mechanism that not only opens and closes the window but the area where insects can enter.


clip_image020


Also, some feel claustrophobic without windows on all sides while sitting in the back but I don’t have a problem with this. My only complaint with the EB/50 passenger side window I have is that the opening knob is not accessible from the entry doors. Having to climb back in to open and close it is a pain.

Concerning the tinting of the windows, if you add a dark tint the rear windows on the back doors, the light from headlights behind you will keep the auto-dimming rearview mirror from doing its job unless the lights are unusually bright. The “safety mirror??? is expensive and I would have liked to have full use of it. Speaking of cost, I was surprised that I had to pay for the window screens which are necessary to keep insects out. You would think these would be a standard item. Make sure they fit snug or you will hear an annoying rattle while driving.

Interior colors, bed and seats coverings.

I opted for leather seats when I bought my van. They are more work to maintain but I like the looks of leather.


clip_image022


My seats are a solid color but the picture above shows a multi color pattern. I also figured that a spill on the sofa would be easier to clean up on leather. Who wants to sit were the Koolaid spilled or even worse, where beer or wine soaked into a fabric seat But SMB offers a simulated leather product made of a vinyl that is worth looking into.


clip_image024


This stuff is very durable from what I have been told. It feels extremely soft to the touch and is thinner than the standard leather SMB offers, but if it stands up as well as advertised, this would have been on my list.


clip_image026


The multi colored patterns are striking IMO and with less maintenance, it’s a good choice.


clip_image028


The only down side I can see is it’s priced about the same as real leather. Another way to go is to look into seat covers similar to the types Cabelas offers. These can be replaced if something bad happens. Still, I do see a lot of fabric seats coming off the line. Definitely nothing wrong with that. Fabric also wears well these days. At least you won’t be screaming bloody hell like when you jump in on a hot leather seat while wearing shorts on a 100 degree day. On the flip side, vinyl and leather and can be cold to sleep on, but a blanket or Therm-A-Rest works OK. The upper penthouse bed is fabric and I prefer this because it’s lighter and warmer.

I also ordered the fully electric seat with the heater and lumbar support. The heater is really nice. In very cold climates, leather seats can be a problem when you climb in, but I usually don’t get in colder weather than 15 degrees around here. When camping, the furnace keeps everything reasonably warm inside, but the seat heater is worth its weight in gold if your back is in bad shape. The lumbar support and electric seat help during long rides reducing fatigue and the seat heater knocks off the chill while driving.

Interior colors.

You can pick out a couple of different colors for the cabinets, and it looks like I had to pay extra for the gray and white. Almond was also another color on the list. Lately I have seen some very dark charcoal cabinets that look great. Wood grain type cabinets remind me of the traditional looks of the older campers of the past. Kind of cool, but I preferred white and gray. It seems the gray or brown should also be a standard item considering most vans utilize these colors. Maybe this has changed because I rarely see vans with the wood grain cabinets coming off the line. As far as other colors I never asked, so check with SMB. One thing I found is it’s a good idea to keep soft non-marking items against the cabinets. I had some boots and a bag roll over and mark up one door. The white really show marks. I have been told that a gum eraser cleans them up good. I always take care while fumbling around inside the van.

The next post will go over my decision on the refrigerator and the water system. Thanks for following the special vehicles section on Autoramblings.com

Sportsmobile – Not Your Standard RV – Part 6

By Dave Boyer

Welcome back to Autoramblings “Specialty Vehicles??? section.

The last posting of this ongoing article mainly touched on the vehicle’s body, drive train, and engine. This portion will go over models, floor layouts and some of the basic interior features. It will also go cover a few other choices that were available in 2006. Again, due to the number of options available, the articles will be in parts, so revisit Autoramblings.com from time to time to catch the updates.

To see better detailed pictures of several vehicles coming off the line at Sportsmobile West, go to this link: My Sportsmobile Forum Pictures

This is my personal album that has pictures of various models as well as interiors constructed by SMB plus a close up look at suspension work done by Quigley and Sportsmobile. Feel free to browse through this album. I have also thrown in some pictures of Sprinter models and a few shots of my rig on the trail. I will update this album frequently so return now and then to take a look. You will also find several images of vehicles from others members of the Forum in their albums.

Models Review

The interior design will probably be difficult to decide on for many perspective buyers. SMB’s web site shows some basic models and their inside arrangements which will help to get you started. Because I am on the larger side of life, it was an easy choice on my part. If you’re lucky to be thin and shorter than six foot, almost any design should work for you depending on what you’re after. The layout can be configured in several ways. SMB has pre-arranged floor patterns available, but other than juggling components around, the models are really broken in to only a couple of types: those you can walk through the van to the back, and those you can’t. Just decide which one best suits your needs.

Here are a couple of typical layouts that many order. Both shots are looking toward the back. The seats shown here can transform into a bed.

clip_image002


clip_image004


This model has four seats for the comfort of a larger family or passenger transportation.

clip_image006


There is a lot of tweaking that can go on, so this is where a trip to SMB really counts. I had looked at the 4×4 vans we have at work and could not see fitting into one. Even a stock empty van looked very cramped and climbing into one didn’t help at all. In fact, it made it feel even smaller. I called SMB to satisfy my curiosity and Lynn (who primarily deals with used Sportsmobile’s) talked me into coming down to look at one. She said they actually appear somewhat larger with the top up and I would be surprised. My first trip to SMB changed my view. She was correct and I was amazed how much larger they looked than our work vehicles. I really liked the 50 model because of how much room and storage it appeared to provide.

clip_image008


The 50 model has a couch that sits crossways toward the back. This couch folds down into a large bed that is better suited for two people than the upper penthouse bed. Another nice advantage to the 50 model is that when the bed is in the couch configuration, there is ample storage available on top of and underneath the back portion of the bed.

clip_image010


Of course if you need to use the lower bed, the stuff sitting on top has to be put somewhere. I have been situations where high winds made it necessary to lower the top and move to the lower bed. I was able to jam most of my equipment up front. But I carry more than the average camper, so it’s not an issue for most folks. With the walk through models, the layouts generally have a couch or “gaucho??? located on one side of the van that also folds down into a bed such as this model in the picture below.

clip_image012


clip_image014


This setup provides a walkway to the rear doors. Although there are many ways to tweak any design to suit your needs, the picture above is the type of layout which many people choose that provides a spot for a marine head, or even a dedicated bathroom with shower just be aware it will take up valuable space.

clip_image016


This custom build 4X4 provides a back bed configured for wheelchair access.

Some “walk through??? models have a dinette area in the back that also can convert to twin beds. These models are popular with owners who prefer a Voyage top as seen in the image above and below.

clip_image018


Remember, many variations are possible. I have seen vans without a penthouse top, rigs with rear bucket seats for passengers, and even bare bone vehicles with very little built into them such as this custom van below.

clip_image020


There are many ways to configure a custom van and although I prefer the 50 model, others may want something different. That’s one of the advantages of a Sportsmobile.

clip_image022


clip_image024


If SMB has a vehicle similar to what you’re looking for, go take a look and see first hand.

While it is possible to order a van with little or no cabinetry, a person who decides to build their own interior might run into problems that companies such as Sportsmobile have resolved due to their expertise and years of design. It’s certainly possible to build your own van with better quality, but it must be planned out correctly. Building a van as tough as a tank might be a great idea until it’s taken to the scales and you find out it weighs close to a real tank. Just think of the waste in time and money if you have to pull out half of what you installed because it’s over weight. My van weighs in at 11,500 pounds, very close to maximum with all components installed by SMB. Can a better built van be constructed? Sure, anything can be improved on. With the time and expertise on your side, it could be an interesting project and possibly save you some money.

The next posting will cover some of the interior items starting with a few flooring options.

Thank you for visiting autoramblings.com.

Dave Boyer